


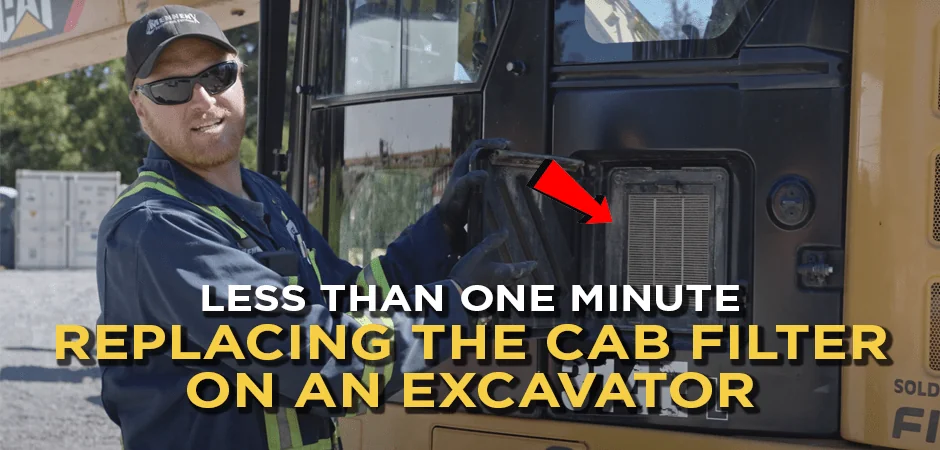
Changing a cabin air filter will take 1 minute, more or less.
You won’t probably even need tools to do it.
In this case, we’ll replace the filter on a Cat 314E Excavator. The air filter is behind an exterior panel on the left-hand side. Other makes and models have the cab filter behind the seat (Caterpillar 320, Bobcat E85, Kubota KX080) or underneath the floor mat (Komatsu PC210LC-11, Hitachi ZX210LC-6, Volvo EC220E).
There’s a video version available on the Tekamo HD YouTube channel:
Table of Content
How To Change the Cabin Filter

In this case, use the keys of the Cat 314E to open the filter compartment.

Pull and lift the worn filter to remove it.
Notice the filter has a clean side and a dirty side. Keep it in mind when installing the new filter.

Compare the new filter against the old one to ensure you have the model.

To install the new external filter, lock the bottom tabs in the compartment, and because it’s friction fit, just push the filter in.
Close the panel, and you’re good to go.
Related Parts
When Should You Change the Cabin Air Filter
Frequency varies depending on the equipment manufacturer: every 50, 250, 500, or 1000 hours. Check your operator’s manual.
Also, pay attention to these signs indicating the cab filter is clogged:
- Reduced airflow.
- Dust or debris buildup.
- Odors from exhaust fumes or other contaminants.
- Allergy or Respiratory Symptoms.

At Fortis HD, you’ll find filter kits for specific hour interval services, including cabin air filters. Visit our Filter Kits Section to see what the kits include, and buy yours.