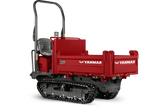
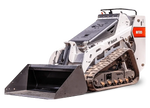
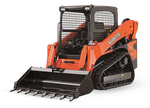
500 Hour Service Interval Guide for a Yanmar C50R Crawler Carrier – Part 1
Written by Luis Montes Updated On February 3, 2025

In this step-by-step guide, we’ll go over some simple tasks for the 500 hour service on a Yanmar C50R crawler carrier.
It’ll be the first part of two posts where we’ll discuss technical aspects, best practices, and how to tackle obstacles you might encounter.
We also have a video version on the Tekamo HD YouTube channel. Check it out.
Dexterity Over Regular Hand Protection

Since gloves sometimes get in the way or might tear too often (depending on your work) and also for dexterity, Shawn (the HD technician who did the service) used PR88 cream. PR88 works great for lighter tasks with lots of oil and protects against grease, oil, paint, adhesives, tar, etc.
Our article “1,000 Hour Service Interval Guide for a Komatsu PC200LC Excavator – Part 2” further discusses PR88’s composition, benefits, and links to the official website.
Water is the only thing that washes off PR88. So, if you won’t be in contact with water, rub PR88 thoroughly on your palms, back of your hands, and between your fingers. Wait a few minutes to dry, and you’re ready to go.
Change the Engine Air Filter

The air filter (and fuel filters) are in the machine’s front-right compartment. Release the three latches to remove the housing cover.
There are two engine air filters. Take them out and install the new ones by pushing them all the way in. They should be straight and centered.
Shawn, who has more than 25 years as a heavy-duty technician, knows and recommends the value of a simple pre-trip before hopping in and running the machine. It is as simple as walking around at the beginning of your shift to check the condition of the equipment, just like our Guide to Maintenance Hour Intervals Article recommends.
Don’t settle for a particular service interval to check the air filters. They are one of the easiest things to do when servicing heavy equipment.
A clogged air filter does not allow the right amount of air into the combustion chamber, resulting in a rich fuel mixture and black smoke from the exhaust.
Reinstall the air filter housing cover, ensuring the dust drain (dust ejector valve) is at the bottom. You might be saying right now, “DUH!” But sometimes, the most obvious things are the ones people overlook the most.
Dust, dirt, and debris knocked out by the air filter fill the housing and collect in the dust valve ejector. To open the ejector, you must drain it regularly by squeezing it.
Doing the Fuel Filters

A steel spanner (fuel filter wrench) is the intended tool for removing the plastic bowls from the filters. Its notches correspond to the bumps on the sediment bowl and spread the load around it.
An oil filter plier (like the one Shawn initially attempted to use) could break the bowl. As our Wrench Extender article explains, an unintended tool can cause delays and even lead to serious labor accidents.
So slip the spanner over the bowl and turn it clockwise to loosen it.
Next, unplug the drains at the bottom of each filter housing so you don’t have to deal with bowls full of fuel.

Our Experience With This 500 Hour Service

As you can see from the image above, the emulsified fuel (fuel mixed with water) in the filter bowls of the Yanmar C50R indicated that they needed service long ago.
Water will eventually clog the fuel filter, preventing fuel from flowing through it. Thus, your engine will starve for fuel and stall.

There was so much contamination that it plugged one of the drains. If this is your case, stick a small screwdriver to get it draining. To speed up the process, loosen the bleeder screws at the top of each housing.
The fuel filters were so full of water that Shawn considered removing the fuel tank plug to completely drain water and debris that might have accumulated in the tank, which he did later.

Because the Yanmar C50R’s tank level is higher than the fuel filter inlet, the tank kept pouring even when it looked empty. If you have the same issue, you can pinch off the inlet hose to prevent fuel from flowing into the fuel filter.
Clean the Bowls and Replace the Filters
Remove the plastic bowls, clean them with parts cleaner, wipe them out with a clean rag, and replace the O-rings. The new filters come with a set of new O-rings: one for the top of the plastic bowl and another for the drain—which is more of a gasket.
Shawn recommends changing them every time you do the filters. Worn-out O-rings could leak and make it difficult to loosen the bowls next time (as happened here).
Once again, consider lubing the O-ring (as many of our articles mention and recommend). According to Shawn, lubricant (motor oil works just fine) prevents the O-ring from twisting and binding as you install the filter, so it seats more evenly. Otherwise, the O-ring could roll and change the shape of its cross-section (as part 2 of this guide shows), causing leaks.
Before installing the new filter, wipe out the housing inside to eliminate any contamination that will otherwise prevent the O-ring from seating properly.
Push the filter to snap it on the housing, then tighten the plastic bowl until the O-ring sits. Tighten the bowls and drains by hand. Keith, another seasoned heavy-duty mechanic, explains why you should not use a tool to tighten spin-on filters.
Our Experience With This 500 Hour Service - Part 2

Remember the fuel tank plug? When we opened it, we ended up with a trickle instead of a steady stream of fuel and water. So, we definitely had a debris blockage in the fuel tank.
We cleared the blockage by fishing a cable inside the tank and found what we suspected: a cloudy mixture of water and fuel (fuel should be clear). If this happens, keep draining until you get a steady stream of clean fuel.

While draining the fuel tank, we discovered its cap was missing. It should have a proper cap because:
- The drain is vulnerable to being accidentally opened. If so, a cap will prevent a fuel mess everywhere.
- It will prevent stuff from going up inside, blocking the valve.
Last Steps

Next, we must prime the fuel filters and bleed air using the hand primer pump.
The pump is the knob on the housing on the left side. Turn it to the left until it releases and pops out, and then you’ll be able to pump it. It’s a tedious process that will take some time, so why not just fill the bowls with fuel before installing them? Because there’s potential for introducing contaminants into the fuel system. Using the hand primer pump greatly reduces that risk.
Loosen the bleeder screw from the first filter coming from the tank and pump until you have a good steady stream of fuel coming out of the bleeder screw.

Next, tighten the bleeder screw on the first filter, open the one on the second filter, and pump until you see fuel (without bubbles) coming out of the bleeder screw.

Push the knob all the way in and turn it to the right to tighten it. Tighten up the bleeder screw. Snug them up with the use of a wrench. There’s no need to overtighten the screws. Otherwise, you will pull the threads out of the housing and have to replace the whole housing.
Finish by starting the machine to check for leaks.
Next Post
In part two of this step-by-step guide, we’ll replace the hydraulic oil filters and refill the hydraulic oil on the Yanmar C50R crawler carrier.


