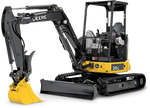
500 Hour Service Interval Guide for a John Deere 17G Excavator – Part 1
Written by Luis Montes Updated On November 16, 2024

In this post, you’ll learn to replace the hydraulic return filter and the pilot filter on a John Deere 17G Mini Excavator.
It’ll be the first in a series of posts showing the tasks associated with the 500-hour service interval.
We also have a video version on the Fortis HD YouTube channel. Check it out.
Need to save time? The following table shows every filter you need for the complete 500-hour service interval:
| Item | OEM | Part Number | |||
|---|---|---|---|---|---|
| Aftermarket equivalent | |||||
| Baldwin | Donaldson | Wix | Blumaq | ||
| Engine Oil Filter | M806418 | B1400 | P502067 | 51365 / 51365XP | N/A |
| Hydraulic Tank Oil Filter | 4692230 | N/A | N/A | N/A | N/A |
| Hydraulic Filter O-ring | T110443 | N/A | N/A | N/A | N/A |
| Hydraulic Pilot Filter with O-ring | 4294130 | PT9424 | P502508 | R12E10CV | N/A |
| Primary Fuel Filter | MIA883874 | N/A | N/A | N/A | N/A |
| Secondary Fuel Filter | MIU803907 | N/A | N/A | N/A | N/A |
| 2 x Fuel Filters O-ring | M800893 | N/A | N/A | N/A | N/A |
| Engine Rocker Arm Cover Gasket | MIU800300 | N/A | N/A | N/A | N/A |
| Engine Air Filter | M113621 | RS3715 | P822686 | 46449/46449FR | N/A |
| Air Cleaner Dust Unloader Valve | 4383877 | N/A | N/A | N/A | N/A |
| Engine Oil | TY26674 | N/A | N/A | N/A | N/A |
| Gear Oil | TY6296 | N/A | N/A | N/A | N/A |
| Hydraulic Oil | 2908-050 | N/A | N/A | N/A | N/A |
Remove the Right and Top Covers

We have to remove the right-hand side panel to get to the top. Use an impact wrench to take out the three 17mm bolts holding the panel.
Pull the top cover edge seal a bit, and use the impact gun to remove two 13mm bolts from the top cover. The cover also has a hook-like piece on the left side. Lift it and pull the cover out.

Vent the Hydraulic Oil Tank

The hydraulic system is usually under built-up pressure due to system overload, clogged filters, or thermal expansion.
So, before moving on to the hydraulic filter, remove the hydraulic tank cap to vent the system.
When you remove the cap, you’ll likely hear a pop sound.
The oil will push out if you don’t relieve the pressure when undoing the housing filter lid.
Put the cap back on, but leave it loose to keep venting the system and preventing dirt and dust from entering the hydraulic tank.
Remove the Hydraulic Filter

Wipe the lid with a clean cloth before removing it to prevent dirt and debris from contaminating the hydraulic system.
Unscrew the four 13mm bolts from the lid using an impact gun. Because there’s a spring underneath the lid, we recommend undoing the bolts across from each other, starting with the one next to the tank cap.
You must use a ratchet to unscrew the bolt next to the joysticks. Crack it a bit loose and the one across, but don’t take them out yet. Hold the lid down with one hand and pull the bolts out with the other.
Flip the lid over and put it aside with the spring on it.
Now, remove the bypass, which sits on top of the filter. The bypass is what the spring holds down. It bypasses the hydraulic oil to ensure continuous fluid flow in the event of a clogged or restricted filter.
Put the bypass on top of the spring. Now you know how the parts are supposed to go when putting them back.
Take the filter halfway out and let the oil drain. Put it in a plastic pan or container to avoid making a mess.
Take a quick look at the filter to ensure there are no pieces of seal or debris hanging off it. We also recommend sampling the hydraulic oil. Refer to your operator’s manual for details.
Install the New Hydraulic Filter

Compare both filters (new and old) to ensure they are the same.
The hydraulic filter doesn’t have a top or bottom side. You can put it in either way.

Drop the filter in its housing and ensure it goes all the way down, not on top of the little pipe on the bottom.
Although it’s not mandatory, we recommend changing the o-ring every time you change the filter.

Pick the o-ring out using a screwdriver or a pointy tool. Wipe the o-ring groove to prevent dirt from getting into the system.
Put the new o-ring on the groove and push it around. Dip your fingertip in the oil and run it along the o-ring to lubricate it. The oil film prevents the gasket from wriggling when you tighten the filter, causing leakage.
Drop back the bypass and the spring. When putting back the lid, ensure the spring stays inside the little pipe of the lid.
Put the lid over and hold it down with one hand. Screw the bolts by hand, and tighten them with a ratchet. Fasten one bolt and the one across it to ensure the spring goes straight down. If you do one corner and the one beside it, the opposite side will lift, and the lid won’t seal correctly.
Replace the Pilot Filter

Take out the belly pan to access the pilot filter—no need to remove the four bolts holding it. The belly pan has slotted holes, so loosen the bolts, slide, and take out the pan.
There’s a hole to access the filter. Unscrew the canister using a ratchet with a 24mm socket. Take out the canister and the filter, which you’ll see hanging there. Put the canister and filter in an oil pan.
Inspect the canister for debris. Wipe it clean with a cloth and brake fluid or some other product.
It’s normal if the old pilot filter has a black color. It’s not due to dirt or contamination but because the oil breaks down.
Double-check the new filter against the old one, and replace the seal. Lubricate the o-ring using oil from the filter’s housing.
When installing the pilot filter, don’t drop it inside the canister (it won’t seal correctly). Put the filter in the hole and push it up until it snaps. Put the canister over and screw it back on using the ratchet.

Finish by putting the belly pan back on.
Check the Hydraulic Oil Level

The sight glass to check the hydraulic oil level is behind the excavator’s right-hand panel.
The level should be between the two marks (low and high).
To check the oil level, ensure the machine is in the following position:
- Stick/Arm all the way out.
- Bucket sitting on the ground and curled all the way in.
- Blade down.
If the excavator is in a different position, it will change the amount of hydraulic oil in the tank and won’t get an accurate reading.
Top off the oil if needed. We recommend Tekamo AW 46 premium hydraulic fluid.

We recommend putting yourself in a position to view the sight glass and pour the oil in (using an oil jug) at the same time, so you stop filling at the right moment. Also, leave the oil level below the top mark to give it room to expand and rise (it’ll happen when the machine gets hot).
Close the back compartment, and put back on the hydraulic tank cap, the top cover edge seal, and the panels (side and top).
Extra parts?

Depending on your dealer, you might get a strainer suction filter. You must drain the hydraulic oil to change this model’s suction filter. However, on a 500-hour service, we don’t need to change the hydraulic oil or the strainer suction filter.
Because the suction filter is metal instead of fiber, it won’t get plugged up easily. The purpose of the strainer filter is to catch contaminants in the hydraulic tank before the oil goes to the pump.
Next Post
Next up, we’ll change the engine oil on this John Deere 17G Mini Excavator.


