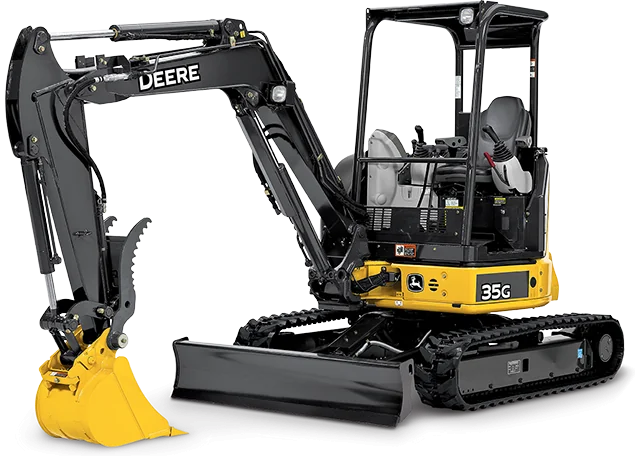
If you’re the kind of person who likes to tinker with machines, you’ll be happy to know replacing an alternator in a John Deere 35G mini excavator is not very difficult. This article will walk you through the step-by-step process of how to do it safely.
This procedure is almost identical for all models, irrespective of the machine size.
Table of Content
Step 1: Lifting the Cabin
Begin by unbolting the front panel of your mini excavator. Next, remove the front lower glass and red-capped cabin bolts with a 19mm socket or wrench.
You can now use a crane or a jack to lift the cabin but first, make sure you close the door. It’s essential to remember you should not put your arm under the cabin until you fix the safety lock in place.
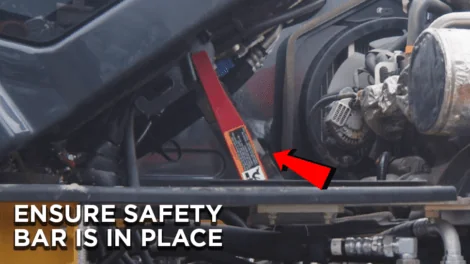
Before you remove any wiring from the excavator alternator, you must disconnect the ground from the battery. This will ensure it’s safe to work on without risk of injury.
Step 2: Disconnecting the Battery
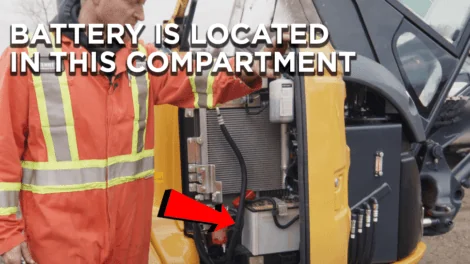
Access the battery of your John Deere excavator behind the panel shown in the image below. Once inside, disconnect the ground and not the positive terminal.
If you disconnect the positive terminal, you will ground all other excavator electronics. This may cause severe damage to your alternator. The ground terminal is always identifiable by a negative sign.
Step 3: Remove the Alternator
Remove the excavator alternator by cutting the zip ties, so the alternator wires are free. This makes the alternator easy to maneuver.
Unplug the three wires, and make sure none have any rips or tears. Now you can disconnect the charge wires using a 10mm socket wrench.
While disconnecting, the whole stud may turn, damaging the wires inside the alternator. To prevent this, firmly hold on to the wire keeping the stud in place when you undo the nut. Once complete, remove the positive wire.
The alternator in this excavator is the fan belt adjuster. This alternator will pivot if you loosen the bolt on top and the through bolt and nut at the bottom. After loosening, you can twist the alternator and take it off the belt.
Remove the remaining nuts and bolts with a 14mm wrench. Begin with the nut, followed by the bolts, allowing the fan belt to dislodge.
Step 4: Compare the New and Old Alternators
After removing the old excavator alternator, compare it with the new one. Check if the pulleys, mounts, and wiring connections are the same. You can also change the pulley if it is worn out.
Step 5: Replace the Alternator
After confirming the new and old alternators are the same, we can replace the old one. Follow the same steps as the alternator removal but in reverse order.
Start by putting the lower bolt back first. Pivot up the alternator and pop the belt on.
Make sure the belt is on the pulley when you put it back. It should be on the crankshaft as well as the fan. Put back the top bolt and spacer. Don’t tighten up this bolt so you can adjust the belt tension.
If there is movement in the alternator, try to grab a pry bar. Be careful, as the pry bar can damage the wires. Pry off the engine lifting point, this will make the belt tight.
Tighten up the top and bottom bolts now. No need to use a wrench to tighten the nut as the bolt has a keeper on it.
The alternator is now mounted, and you can reconnect the wires. You will hear a click when pushing the plug in. Clean the electrical connection using an emery cloth.
After installing the alternator, try to grab a zap strap that will back up the way the excavator was initially. Use zip ties to secure everything in place so the wires won’t rub against the alternator and get damaged.
Step 6: Reconnect the Battery
With your alternator now mounted, you can reconnect the ground. You can expect a little spark, but that’s nothing to worry about. It means the computer capacitors are recharging.
Always ensure the terminals are tight and don’t have any give when touched.
Step 7: Test the Alternator
Check the excavator alternator battery with a multimeter or testing light.
The battery will read 12.5 Volts if the engine is not started. After starting it, you should see a voltage of around 14 Volts. A value above 15 Volts means the alternator is overcharging.
Sometimes, you’ll get a value of around 12.5 Volts even if the machine runs. You can check the alternator’s back to see if the alternator is charging.
As the machine runs, be very careful of spinning fans, the fan belt, and hot exhaust.
Make sure you are grounded, then touch the positive terminal on the back of the alternator, as shown in the image below.
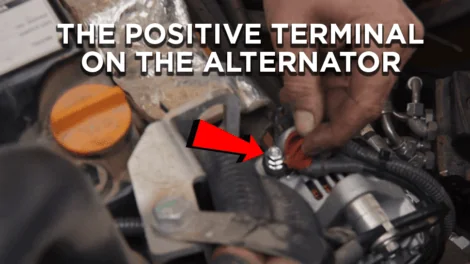
If you get a reading around 14 Volts, it means the battery is charging.
Step 8: Reset the Mini Excavator Cab
The final step of this excavator alternator replacement is putting the cabin back in place. Do this by lifting the cab to remove the safety lock, then lowering the cabin back slowly.
Install the three mounting bolts and the front glass. Finally, put back the front panel.
This machine is now ready for work.
End Notes
So, if you’re experiencing problems with your excavator alternator, don’t worry. You can follow these simple steps to replace it with a new one and prepare your machine for the next job.
To learn more about machinery repair, check out FortisHd Blog.


